Sun Salutation Step by Step: Postures, Breathing and How to Do It
The sun salutation is one of the best-known yoga sequences. It combines several linked postures and is usually practised by coordinating movement with the breath.
Even so, it is not always taught in exactly the same way. Depending on the school, style or teacher, the order of the postures or the way certain transitions are performed may vary.
For this reason, this guide does not present a supposed single or universal version. Instead, you will find a basic, easy-to-understand version of the sun salutation, which is useful for learning its main postures, the logic of the sequence and how to begin practising it.
What is the sun salutation?
The sun salutation, also known as Surya Namaskar, is a sequence of postures performed in a linked flow.
In many classes, it is used at the beginning of the practice to get moving, mobilise different areas of the body and begin coordinating movement and breath. At other times, it forms part of the main practice and may be repeated several times.
One of its most recognisable features is precisely this sense of continuity: instead of working on each posture separately, the body moves from one to the next at a set rhythm.
Furthermore, there is no single form of Surya Namaskar that represents all yoga schools. A review of the evolution and different forms of the sun salutation published in the Journal of Ayurveda and Integrative Medicine describes how different figures and schools have helped develop and spread different versions of the sequence.
The sun salutation step by step
Below, we will look at a basic version of the sun salutation step by step. It is not the only version that exists, but it is a good way to understand how the sequence works.
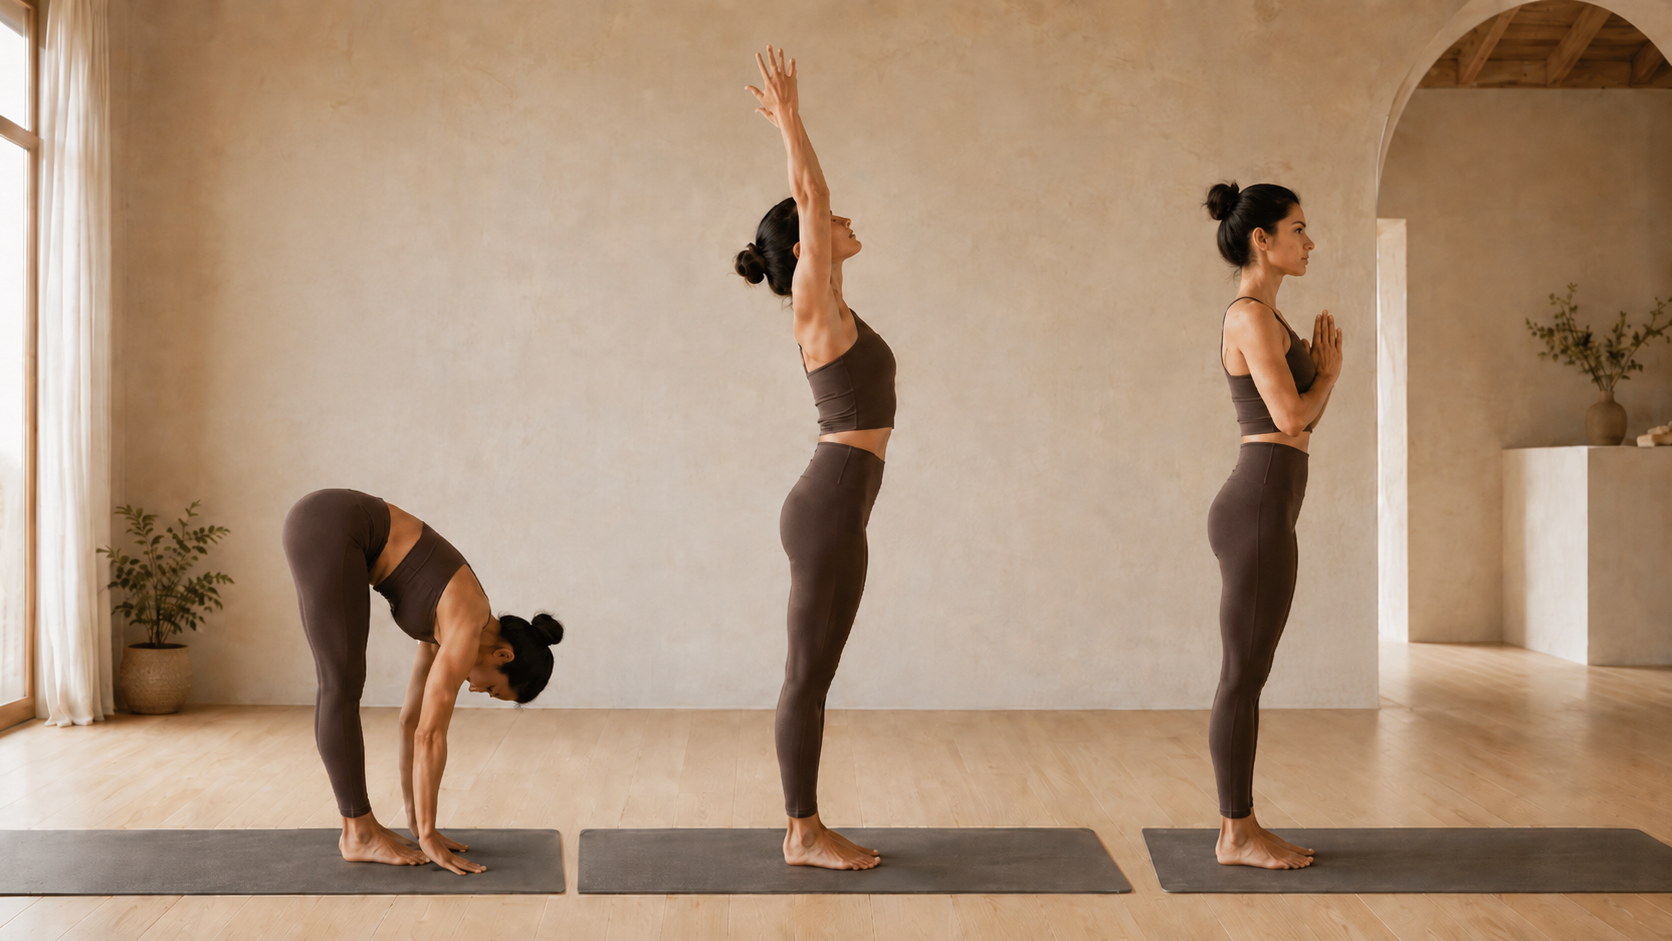
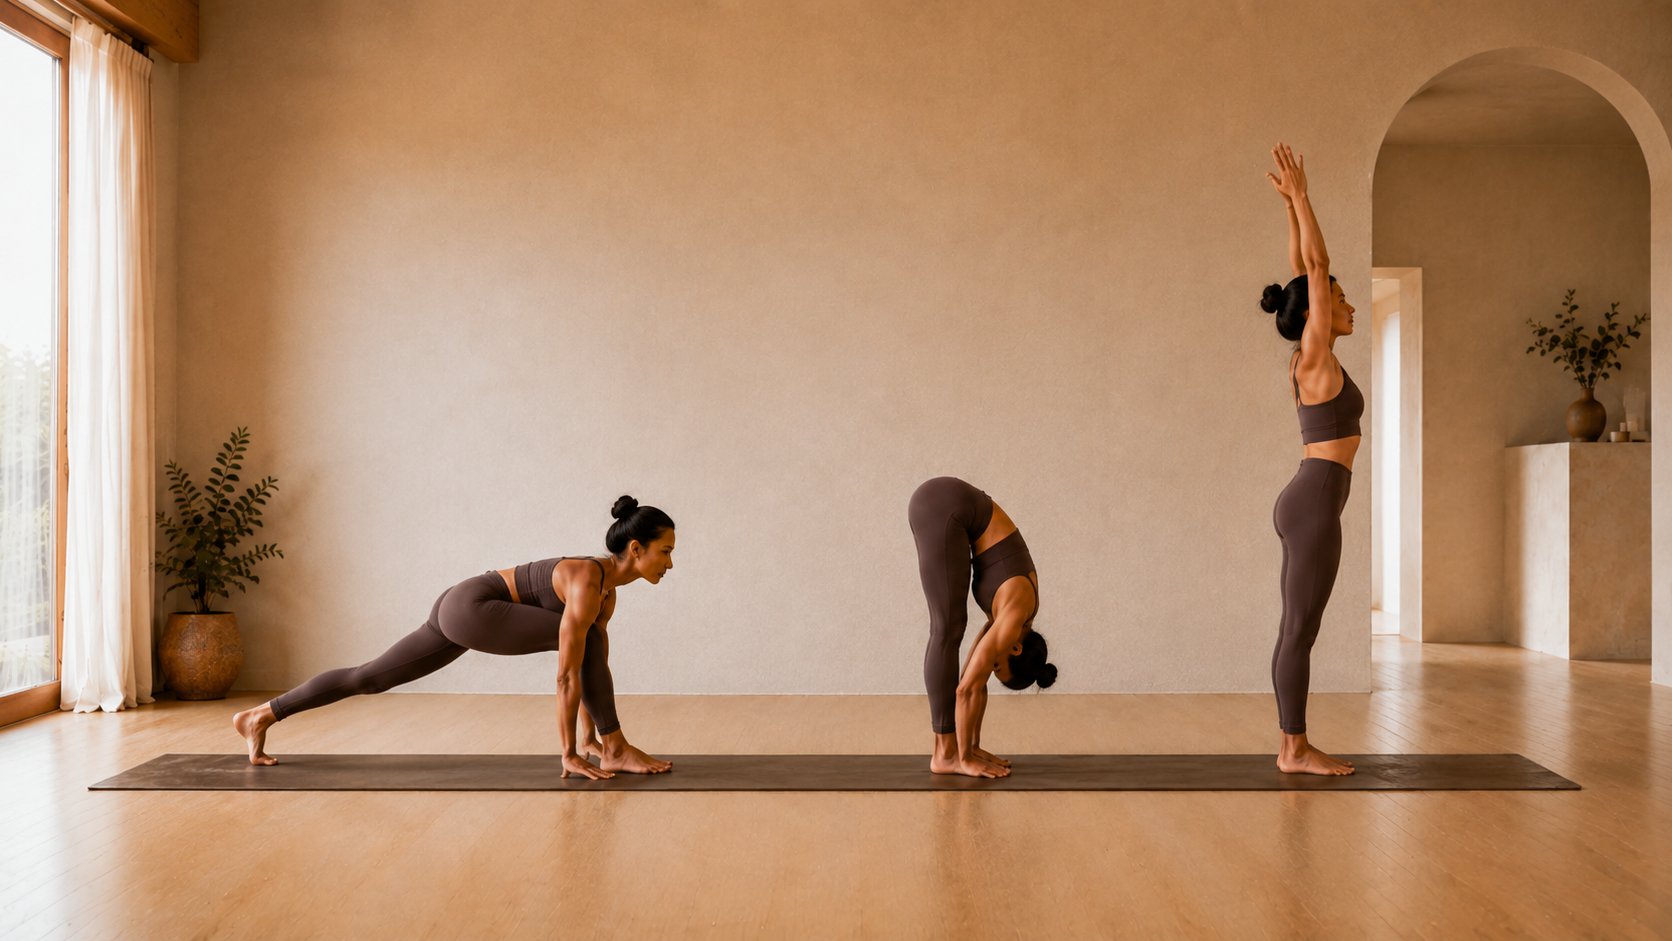
1. Standing posture
Begin standing, with your feet grounded and your spine lengthened.
You can keep your feet together or hip-width apart, depending on what feels more stable. Let your arms rest by your sides and keep your gaze forward.
The idea is to begin with an active but calm posture before starting the movement.
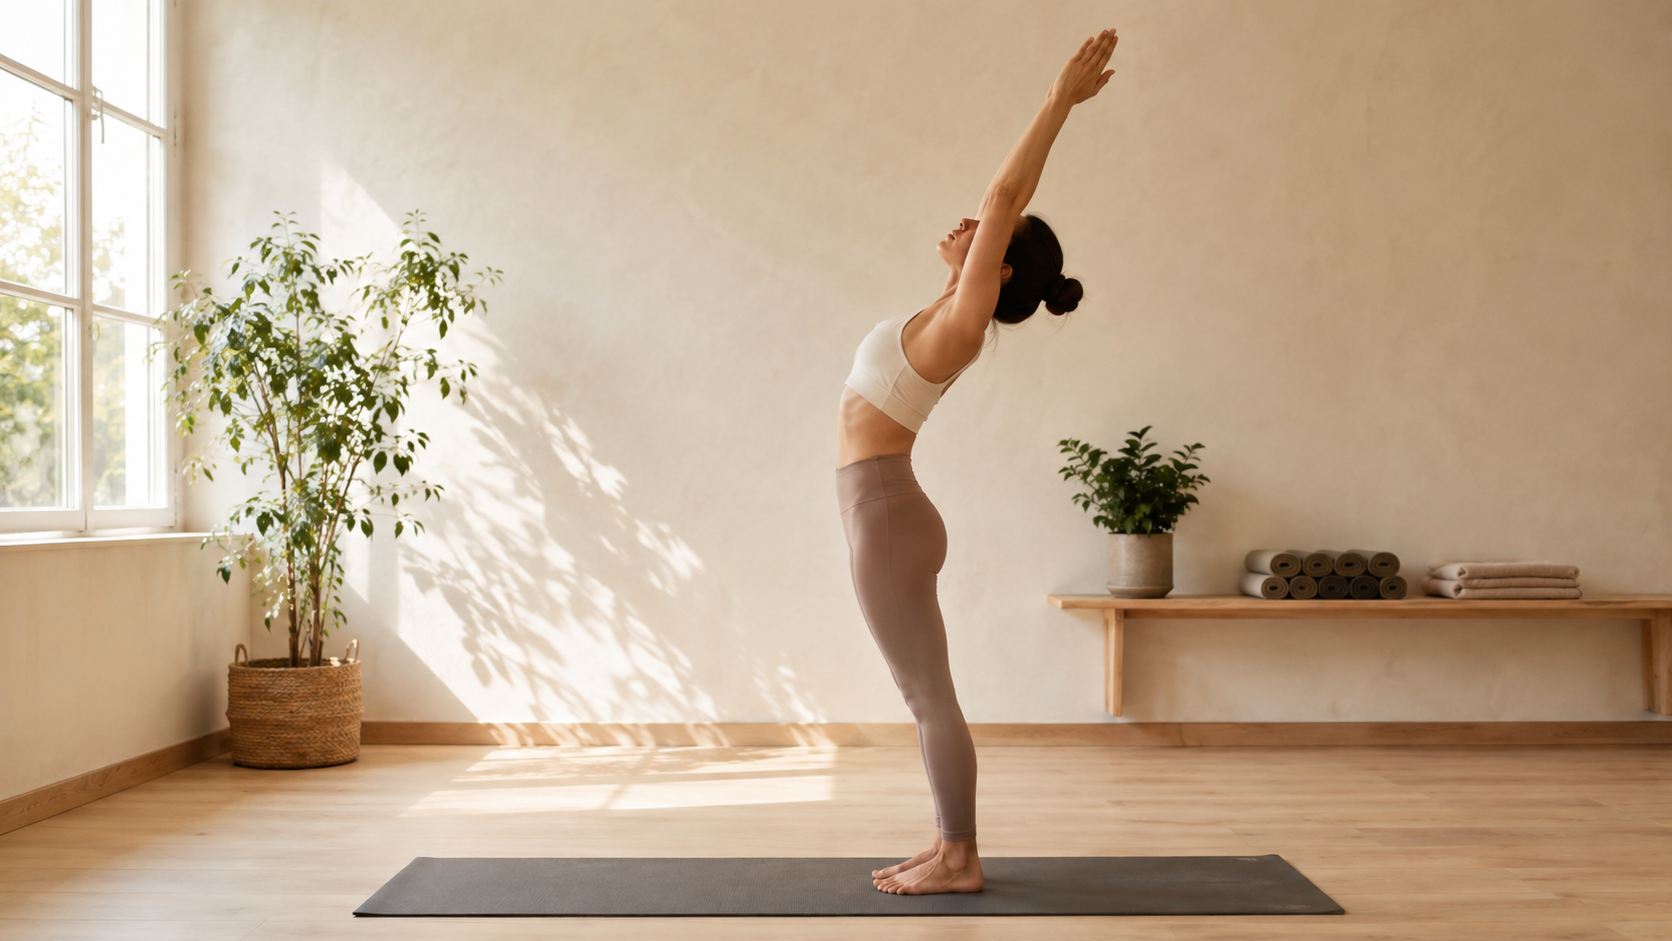
2. Arms overhead
From standing, raise your arms overhead.
Reaching towards the ceiling allows you to continue the sequence by lengthening the body. There is no need to arch your back excessively: simply raise your arms and maintain a comfortable position.
At this stage, it usually feels natural to inhale.
3. Forward fold
From arms overhead, fold forwards, bringing your torso towards your legs.
Your knees can bend if needed. For many people, bending them slightly is preferable to straining the back while trying to reach the floor.
A long exhalation usually works best here.
4. Halfway lift
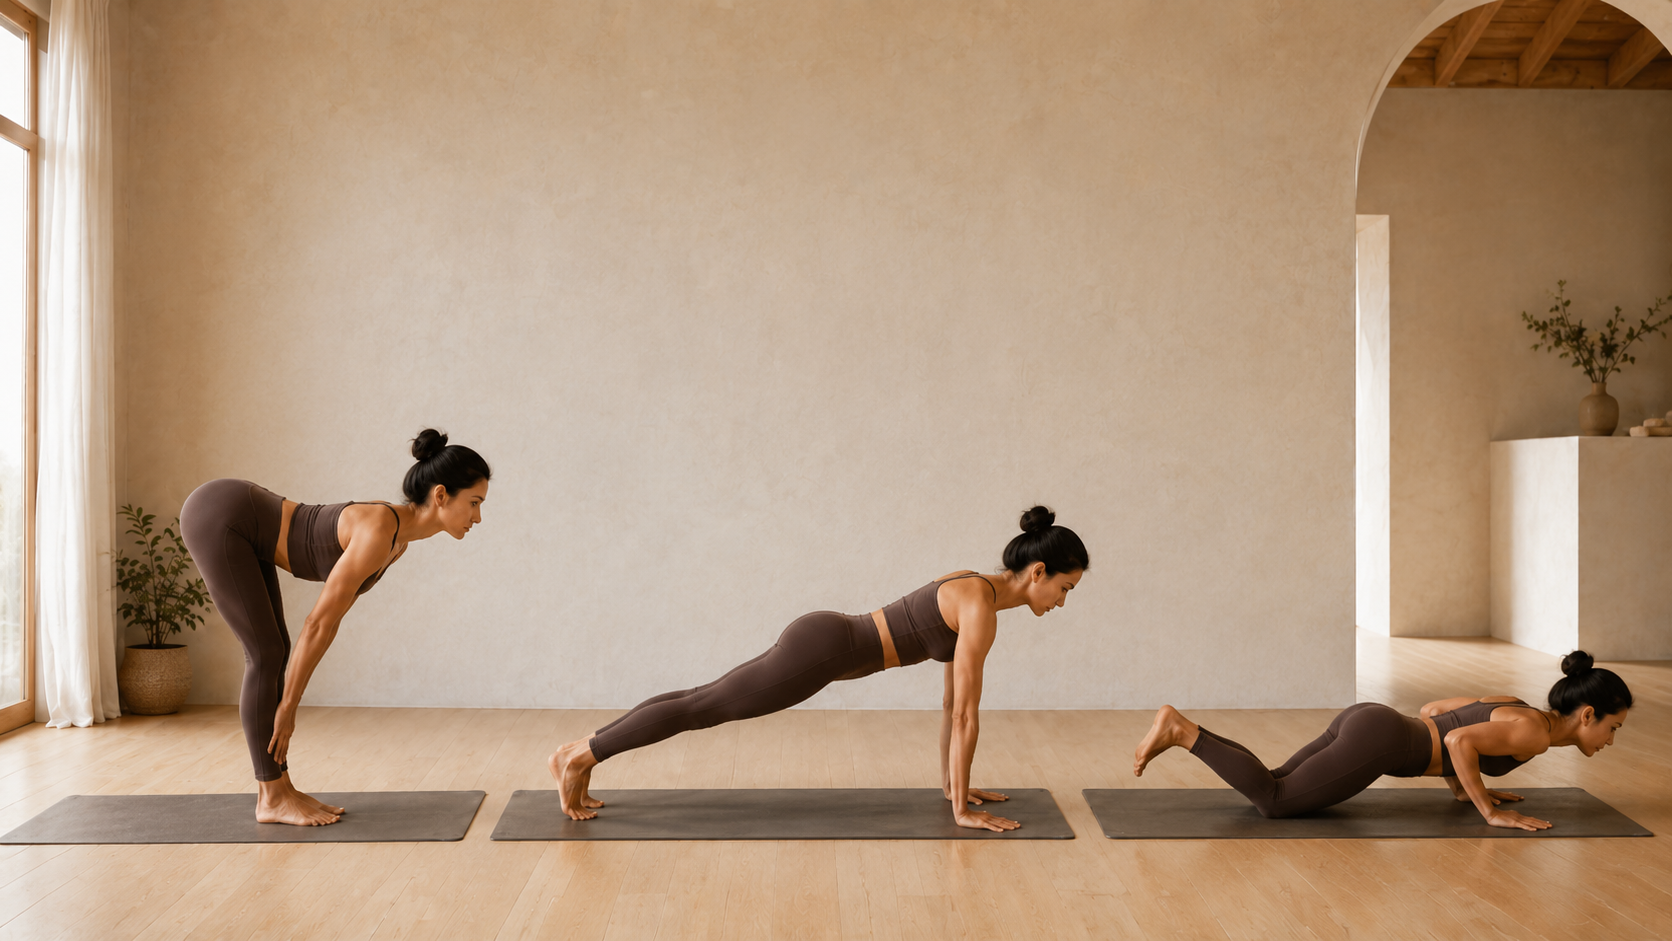
From the forward fold, lengthen your spine and lift your chest slightly.
Your hands can rest on the floor, your shins or blocks, depending on each person’s mobility. The important thing is to create length in your back rather than remaining completely rounded.
This position helps prepare you for the transition backwards and is usually accompanied by an inhale.
5. Step back into plank
From the halfway lift, step one foot back and then the other until you reach a plank position.
Aim for a stable posture, with your hands firmly grounded and your body well organised. If you are just starting, you can also lower your knees to adapt the transition.
6. Transition towards the floor
From plank, lower towards the floor in a way that suits your level.
In a simple version, you can lower your knees and descend with control. Other ways of practising the sun salutation include different transitions, such as knees, chest and chin, or Chaturanga.
The main idea is simple: lower with control and do not try to force a transition that does not yet feel comfortable.
This stage is usually accompanied by an exhalation.
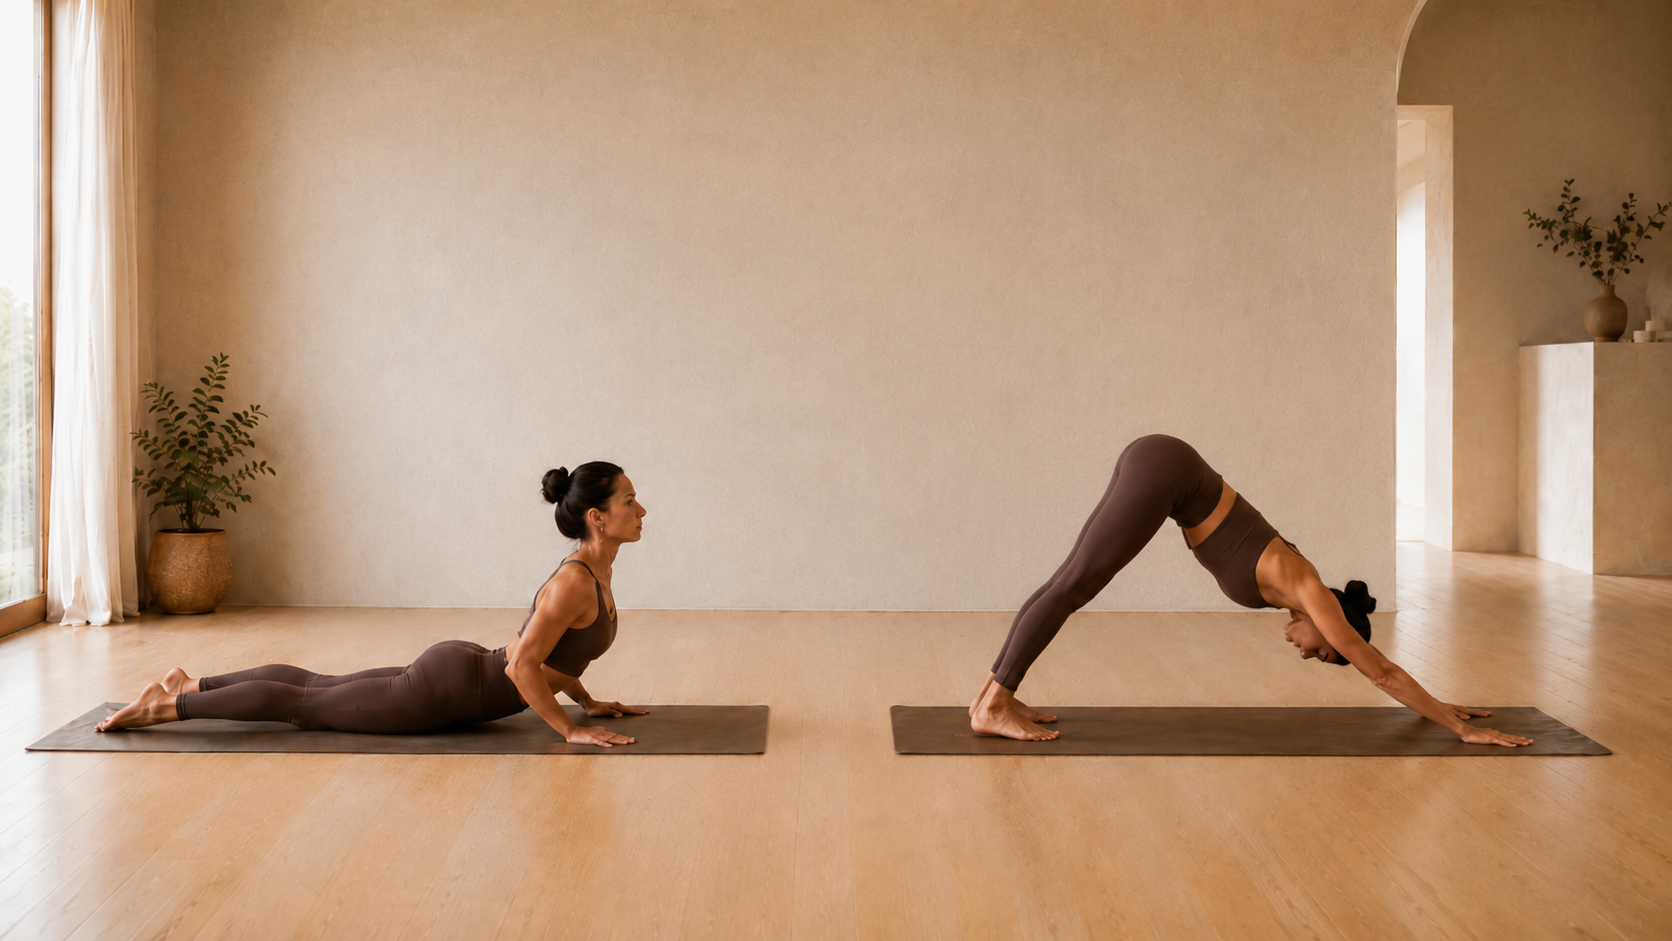
7. Gentle cobra
Once you are close to the floor, lift your chest into a gentle cobra.
Keep your legs extended behind you and use your hands to support the posture without seeking an extreme extension. Keep your shoulders away from your ears and your neck in a natural position.
This stage is usually accompanied by an inhale.
8. Downward-facing dog
From cobra, push the floor away with your hands and draw your pelvis back and up.
You will arrive in downward-facing dog. Your heels do not need to touch the floor, and your knees can remain slightly bent if this helps you lengthen your back more effectively.
There is no need to seek a rigid or perfect shape. Prioritise a stable, comfortable posture.
9. Step forwards
From downward-facing dog, step one foot forwards and then the other until you return to the front of the mat.
If this transition feels difficult, you can move forwards in several steps. There is no need to try to do it all at once.
10. Forward fold
Once at the front, let your torso fold back towards your legs.
Your knees can remain slightly bent and your head relaxed. This position prepares the body to close the sequence.
11. Rise with arms overhead
From the fold, begin to stand up and raise your arms overhead.
The movement should feel gradual and controlled, without needing to propel your body quickly upwards.
12. Return to standing
Finish by lowering your arms and returning to a stable standing posture.
You have now completed one basic round of the sun salutation.
How to coordinate your breathing in the sun salutation
One of the most common questions when learning the sequence is how to breathe during the sun salutation.
As a general guide, a simple pattern is often used:
- inhale as you lengthen or open the body;
- exhale as you fold forwards or during certain transitions.
For example, it is common to inhale as you raise your arms, exhale as you fold forwards, inhale as you lengthen your spine, exhale as you lower, inhale as you move into cobra and exhale as you transition into downward-facing dog.
The coordination of postures and breathing is part of the different ways of practising Surya Namaskar. Specialist literature also describes the sun salutation as a dynamic sequence in which movements are accompanied by breathing patterns.
If you are just starting, there is no need to turn this coordination into a technical test. First understand the sequence of postures, then gradually refine your breathing.
Sun Salutation A and B: what is the difference?
It is also common to find references to Sun Salutation A and Sun Salutation B, especially in practices associated with Ashtanga and some Vinyasa styles.
In brief, Sun Salutation B incorporates additional movements and postures compared with A, so it is usually a longer sequence.
These versions should not be confused with a supposed universal sequence of twelve positions either. Different schools have structured Surya Namaskar in different ways.
If you are a beginner, you do not need to memorise both versions straight away. It is more useful to understand a simple sequence first and become familiar with its transitions.
Benefits of the sun salutation
The sun salutation brings several actions together in one sequence, which is why it is frequently used at the beginning of or during a yoga practice.
Its practical functions include:
- helping you gradually get moving;
- mobilising different areas of the body;
- coordinating breath and movement;
- creating continuity and rhythm within the practice;
- serving as preparation for other postures.
The intensity of the practice can vary considerably depending on its pace and how it is performed. A systematic review of the energy cost and metabolic intensity of yoga analysed studies that included Surya Namaskar and found that, although much yoga practice is generally performed at light intensity, certain sun salutation sequences can reach higher intensities.
This also helps explain why it does not make much sense to assign the sun salutation a single level of exertion: a slow, adapted sequence with pauses can feel very different from several linked rounds performed at a more dynamic pace.
Common mistakes when doing the sun salutation
Going too fast
Trying to follow a fast pace before understanding the postures usually makes the practice more difficult. Fluidity develops once the sequence becomes familiar.
Forcing the forward fold
You do not need to touch the floor with your hands. Bending your knees slightly can make the posture more accessible.
Losing stability in plank or cobra
During these stages, it is easy to focus too much on reaching the next posture and pay too little attention to how the transition is performed. Reduce the intensity or use an adaptation if needed.
Copying one version as if it were the only valid one
There are different ways of teaching Surya Namaskar. Finding a different variation in another class does not necessarily mean that one of them is incorrect.
Trying to memorise everything at once
It is easier to learn small groups of movements first and link them together afterwards.
How to start if you are a beginner
If you have never practised the sun salutation, you can start much more simply than it may seem.
- perform the sequence slowly;
- start with just a few rounds;
- bend your knees when needed;
- lower your knees during transitions if necessary;
- prioritise understanding the order over speed;
- keep your breathing comfortable.
You can also practise some postures separately first. Becoming familiar with the forward fold, plank, cobra and downward-facing dog will make it easier to link them together later.
Do you need to learn the sun salutation in a class?
It is not essential, but it can be useful.
A guide can help you understand the general sequence, the names and the logic behind it. In a class, a teacher can also observe aspects such as your pace, alignment and possible adaptations to the postures.
This can be particularly useful if you have questions about transitions towards the floor, plank or the return forwards.
A sequence learned step by step
The sun salutation may seem complicated at first because it brings together many consecutive actions. However, once you begin to recognise the pattern, the sequence becomes much easier to follow.
You do not need to do it quickly or copy a perfect version. Start by understanding the main postures, practise the transitions calmly and allow coordination with the breath to develop gradually.
Sources consulted
To prepare this guide, we cross-checked the structure and different forms of Surya Namaskar, as well as the available evidence on the intensity of its practice, using institutional sources and scientific literature.
- Morarji Desai National Institute of Yoga — Surya Namaskar, an institute under the Ministry of Ayush of the Government of India.
- Journal of Ayurveda and Integrative Medicine / PubMed Central — Insights on Surya Namaskar from its origin to application towards health.
- PubMed — A Systematic Review of the Energy Cost and Metabolic Intensity of Yoga.
Want to practise yoga in a class?
You can explore yoga studios on Yogagenda and find a practice that suits you.
Last reviewed: August 2026.